

Author Archives: 2010admin

Your bathroom is the one room in your house you can’t go a day without. So why do we choose to ignore it?
At Madsen Inc, we’re making bathroom talk socially acceptable by recognizing all the ways this room can totally change your everyday relationship with your home. From pampering yourself in the morning to getting the kids cleaned up before dinner, it’s time to give your bathroom a little TLC so it can start returning the favor!
Here are 5 reasons to finally make that bathroom remodel a reality.
1. Increase the Value of Your Home — Big Time
For all you home reno TV lovers out there, get this: HGTV reports a minor bathroom remodel can yield up to 102% return at resale, while a mid-range bathroom remodel typically results in $1.71 increase in home value for every dollar spent, according to Zillow. So if you’re thinking of selling in the near future, it’s really a no-brainer. But even if you’re not, bringing your bathroom up to the 21st century and taking care of necessary plumbing repairs is a sure way to make your home more attractive to potential buyers, while enjoying all the updates for yourself in the meantime!
But keep in mind, if this is the biggest incentive driving your bathroom remodel, make sure your decor and style choices are ones with lasting value. Not every hot trend now will pay off the same in the future.
2. Make Your Daily Routines Easier
Everyone has different visions of the perfect bathroom. It’s possible yours was designed to the ideals of its previous owners, not yours. Or maybe your needs have changed over time. Whether your family is growing, your kids have grown up, or the in-laws are moving in, remodeling your bathroom to be more functional for you and your family can give you back time in your day — and hair on your head.
Add storage, increase the square footage, install His & Her sinks, add heating flooring; the possibilities are endless. So if you’re sick of constantly trying to make it work in your space, it’s time to make your space work for you.
4. Increase Energy Efficient, Enjoy More Savings
The best part about making any room in your home more energy efficient is that while you’re helping the environment, you’re also saving money. Win, win. Major advancements in technology and eco-friendly designs over the last few years have changed home systems and appliances for the better. Integrating smart thermostats, occupancy sensors, or water monitoring systems into your design can give you more control over your energy use, while energy-efficient exhaust fans, on-demand water heaters, and low-flow shower heads, faucets, and toilets all reduce the use of water, heat, and air to lower utility costs.
Here’s a helpful stat to put things into perspective: a 30-year-old toilet used 3.5 to 6 gallons of water per flush, while newer, more efficient toilets use just 1.28 gallons. That’s a difference you’ll notice immediately on your water bills.
5. Design a Room You Love — and Loves You Back
While it may be the smallest room in the house, your bathroom is also one of the most used. So as much as we try to overlook it, investing in your bathroom can have a huge impact on how you use it — and how you feel when you do! A complete refresh can turn an outdated bathroom you only use when you have to into a relaxing escape that you can’t wait to get into!
More counter space and a designated make up area or walk-in closet can make getting ready more enjoyable, while a soaker tub, towel heater, or steam shower can transform a bathroom into a resort-like spa. Reduce stress and anxiety with calming light fixtures, make clutter disappear with smarter storage, and choose colors and textures that will help you relax. Instead of booking spa days, invest in every day.
6. Create a Safer Space for the Whole Family
Whether you realize it or not, the bathroom can be a dangerous place! Wet, slippery floors will claim victims of any age. In fact, falls are the number one cause of accidental injuries and result in more than 20% of emergency room visits (National Floor Safety Institute). Older bathrooms also present a handful of safety risks — from uneven floors, mold and mildew, electrical issues, and more.
With a bathroom refresh, you can integrate safety-focused features like grab bars, hands-free faucets, anti-slip flooring, and more to help minimize the risks. Plus, newer walk-in showers and tubs, handheld shower heads, and adjustable height vanities not only add safety and ease, but they’re also a great style choice, and add a feeling of modern luxury that you deserve!
Come to think of it, we can’t find a good reason for you not to pursue a new bathroom remodel! While the benefits are endless, having the right team to turn your visions into a reality is key to getting the most out of each one! Contact the experts at Madsen Inc to discuss your bathroom wish-list today!

6 Tips to Help You Tackle Toilet Sweating
Whether or not you’ve heard of the phenomenon “toilet sweating,” your toilet does it — it may even be doing it right now.
Even though a sweaty toilet doesn’t mean anything is actually wrong with it, if you ignore it, that’s when problems can start, from ruining the seals around the base to damaging your floors and fixtures. While a simple wipe down may do the trick in most cases, there are better ways to keep it minimal.
Check out these expert tips to help you keep your toilet sweating under control.
First Things, First — What Causes Toilet Sweat?
If you’ve ever had a cold drink on a hot day, you’ve probably noticed water droplets covering the outside of your glass. The exact same thing happens to your toilet. When moisture in the air comes in contract with a cold surface, beads of water will form. This is a result of the difference in temperatures between the cool water inside the toilet (which is typically between 50-60 degrees) and the bathroom’s warm air. And thanks to showers and baths, your bathroom is the most humid room in your house.
Ways to Stop Your Toilet from Sweating
- Reduce Moisture in Your Bathroom
Due to those hot showers and long baths, your bathroom is often excessively humid, and the best way to make it less humid is to remove the moisture. Using a portable dehumidifier is one of the most common ways to eliminate moisture from the air. You can also try being more conscious of how long or hot your showers are. Fun fact: there are a lot of health benefits to taking cold showers! - Increase Ventilation
Another way to reduce humidity is to get the air moving. Simply opening the bathroom door or a window while showering is an easy way to reduce the likelihood of condensation. You can also install a fan and run it whenever you do have any hot water running. The key is to get the warm air moving and make sure it has a place to escape. Just make sure the air outside is cooler than inside, otherwise you’re only aiding the problem. - Insulate Your Tank
You may have noticed some homeowners will line their toilet with fabric. While it may be a design statement for some, it’s actually a preventative measure for others. By covering the exterior of your toilet tank, you prevent the cold surface from coming in contact with the warm air. There are also foam insulation kits or wraps available if simplicity over style is what you’re going for. But if you do choose a fabric, make sure to wash it regularly to eliminate mildew from the moisture it absorbs! - Use a Toilet Tank Liner
If you like the look of your toilet just the way it is, you could try lining the inside of it instead. A toilet tank liner is a foam or plastic liner that can be placed inside the tank to prevent the transfer of cold from the water inside the tank to the outside. A plumber can also come out and put sheets of polystyrene or foam rubber in the tank walls for you. - Warm up the Water
By now you know that cold water is one of the two main culprits involved in toilet sweating. So if you warm it up, you can also prevent it from happening. A plumber can install a mixing valve at the tank inlet which will work to integrate warmer water into the tank to keep the overall temperature less disparate from the outside air. - Check for Leaks
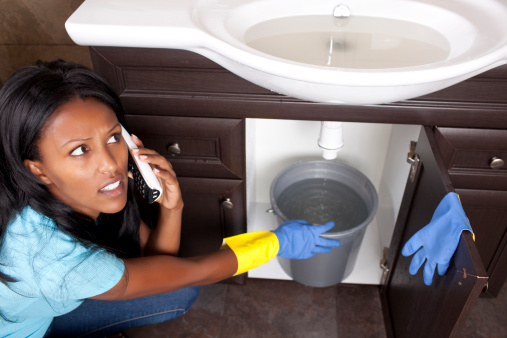
In some cases, toilet sweating is actually the result of a leak. Inspect your flapper valve at the bottom of the tank to see if it’s leaking water. If it is, that means cold water is constantly getting pushed into the toilet, increasingly the amount of condensation that forms. It also can add significantly to your water bill. By fixing the leak, the water in the tank will gradually reach room temperature which will help solve both problems!
If you’ve noticed your toilet getting extra sweaty recently, you can try any of the tips above, or just call Madsen to take care of it for you. Our plumbing experts can take care of all the quick fixes you need to prevent bigger problems down the road. Contact us today.
You don’t have to be a yogi or meditation expert to appreciate the benefits of good-quality air. We all want to breathe easier. But that’s not going to happen if your home is filled with contaminants, dust, and pet dander. Stale air from your heating system blasting all winter long hasn’t helped either.
We may not be quite ready to throw open those windows. And as soon as we are, we’re only inviting more allergens into our homes. So what can you do to improve your air quality? Here are six simple tips that will make a real difference and make breathing easy all summer long.
- Change your air filter every few months.
Clogged, dirty air filters not only reduce air flow from your system but also introduces excess allergens and unwanted particles into your living spaces. So you’re basically hitting yourself with a double whammy. To keep your air conditioning system running efficiently, simply change your filter! It will prevent spiking energy bills and keep your air a lot clearer. The Department of Energy recommends replacing your air filters every month or two during the summer, and every three months the rest of the year.
- Keep humidity at bay.
More moisture equals more bacteria. And in the spring and summertime, there’s lots of it! So by removing excess water in the air, you can reduce the amount of mold and other unwanted particles floating around your home. Dehumidifiers are a fairly cheap and easy way to get a handle on your humidity.
- Routinely vacuum carpenters and rugs
If you have pets, this is a MUST. But even if you don’t, vacuuming once a week can significantly reduce the amount of dust and dander that’s just sitting in your home for you to breathe in daily. Don’t stop there, make sure you also clean other areas known for collecting dust, like blinds, window sills, and bedding. The frequency with which you clean those areas will depend largely on the size of the space and how often it’s used. Cluttered spaces often build up more allergens than others, while those that tend to remain vacant will more easily collect dust too.
- Add some plants to your space.
Did you know there are a lot of plants that can actually detoxify your air for you? It’s true. Several varieties actually remove dust and germs stored in furniture and other materials throughout your home. A couple of low-maintenance, air-purifying plants that also look pretty cool and classy are aloe vera plants, pothos plants, and snake plants.
BUT keep in mind that some plants will have the reverse effect by fostering the growth of mold. If indoor allergens are a real problem for you, make sure the plants you choose are actually helping and not making things worse.
5. Use vents to remove cooking fumes.
This one couldn’t be any easier. After cooking big meals, turn on your vents right away! While most people only think to use exhaust fans when they burn the meatloaf, they are actually super helpful in quickly eliminating unwanted moisture and odors that if let to linger, will only hinder your air’s quality.
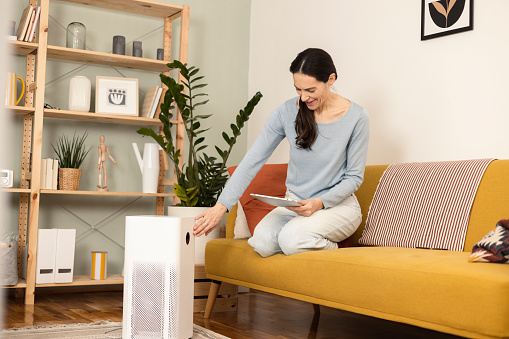
6. Invest in an air purifier.
If you’re struggling to figure out or control the source of your pesky indoor allergens, try an air purifier — specifically an ionic purifier. When placed in the most commonly used areas of the home, they can capture many of the irritants that keep you sniffling and sneezing all day long. It won’t eliminate them completely, but it will definitely make a difference.
If you’re looking for more help ensuring your air quality is the very best this spring, contact the experts at Madsen Inc. Our furnace and air handlers can make sure your system is optimized for the best airflow and will keep your home comfortable all season long.
We can all sympathize with that moment you’re taking a shower or washing your hands and the water starts building up. It always seems to happen at the worst times, and it can also be pretty gross — depending on what murky mess is to blame.
The good news is there are several easy, at-home remedies to clearing those clogs quickly, plus a bunch of ways to prevent them from happening in the future.
Let’s start with 6 drain-cleaning hacks:
- Boil Water
Whether you use a kettle, stovetop, or microwave, everyone has access to hot water. This simple but effective solution can help you get clogged debris and grime moving again. Just slowly pour the boiling water down the drain in little portions at a time over several minutes. This allows the water time to work its magic. - Make a Baking Soda Mixture
When mixed with a variety of household ingredients, baking soda packs a powerful punch against drain clogs. Here are a couple of effective pairings:– Baking Soda & vinegar. 1/3 cup of baking soda with 1⁄3 cup of vinegar. It will fizz immediately which will help combat debris and grime.
– Baking Soda & Salt. 1⁄2 cup of baking soda with 1⁄2 cup of salt. Pour it down the drain and sit for 20 minutes, then add boiling water to dissolve the buildup. For an even stronger defense, add a little liquid dish detergent.– Baking Soda & Lime Juice. 1⁄2 cup of baking soda with 1⁄2 cup of lime juice. Pour it, plug it, and let it sit for an hour before running hot/boiling water down the drain.
– Baking Soda & Cream of Tartar. 2 cups of baking soda with 1⁄8 cup of cream of tartar. Shake it up in a jar, and let it sit for an hour before using.
3. Grab a Plunger
If you have a bathroom, chances are you have a plunger. In the same way, this handy little tool works on your toilet, it can work on your drain (cup plungers work best). Fill your sink with some water, and fit the cup of the plunger over the drain. Work the plunger up and down for about 20 seconds, rolling the plunger cup to force water down the drain. Remove the plunger to see if the remaining water runs down the drain. If not, repeat.
4. Use a Drain Snake
The sole purpose of a drain snake is to unclog drains, so it makes perfect sense to use one! These flexible metal ropes are a lifesaver and can be found at most home improvement or grocery stores. They have a spiral tip, which latches onto hair and other gunk. To use it, move the snake down the drain, moving it ever so slightly to try to grab as much blockage as you can. When you hit a stopping point, bring it back up and the clog should come with it.
5. Try a Wire Hanger
Think of a bent-wire clothing hanger as a homemade alternative to a snake drain. Straighten out the hanger and bend a small hook at one end. Send this side down the drain. This tactic is especially helpful for shower drains backed up with excess hair. Just be careful not to scratch your shower, toilet, or sink as you use it.
6. Suck it Up
If you have access to a shop vacuum, specifically one that can handle wet clean-up jobs, this could be an effective way to get rid of that clog. First, set the vacuum to liquid mode. Then create a very tight seal over the drain and cover around the vent to prevent mess. With the right amount of power, the vacuum should be able to pull up the clog. It’s worth a shot!
How to Keep Your Drains Running Smoothly
Ideally, we’d all prefer to not have to pull out the plunger or spend money on a plumber. So if you want to keep your drains clear, here are some helpful prevention tips.
- Don’t dump excess grease down the drain. Instead, pour it into an empty coffee can and throw it in the trash.
- Coffee grounds and tea bags don’t belong in your disposal.
- All bones and eggshells should go in the trash.
- Foods like pasta and rice don’t always pass through the disposal, so use a compost bin or the trash instead.
- Uncooked vegetables and fibrous fruits and peels, such as broccoli stems, carrots, and corn cobs, should all go in the trash, not your disposal.
- When brushing your hair or taking a shower, don’t let excess hair make it to the drain. Throw it away.
- Keep all harsh chemicals or paint away from your drains.
- Regularly fill the sink with water and release it to flush out piping.
Even all the home remedies and prevention methods out there aren’t guaranteed to keep your drains clear all year long. If you haven’t had much luck or just want to have a certified plumber take a look, contact Madsen Inc. today. We’ll utilize the safest, most effective ways to clean your drains and prevent future obstructions to keep them running smoothly.

Tips to Make Sure That Your HVAC Is Ready For Spring
If your spring cleaning checklist doesn’t include your HVAC system, then it’s time to add another bullet! Let’s face it, if there’s one thing we couldn’t live without once summer rolls around, it’s our air conditioning. So let’s not risk any issues or breakdowns come those dog days by neglecting our systems now.
The experts at Madsen know HVACs, and we’ve got 6 tips to help you make sure your unit is keeping you nice and comfortable come summertime.
1. Change Your Air Filter
Dirty filters restrict airflow and foster mold growth. That’s not only gross, but it’s also dangerous. Changing your filters monthly will help you keep dust and dirt from building up which both keeps your air cleaner and your system from having to work harder to keep your home comfortable. Plus, it’s super easy to do. If you have a washable filter, make sure to clean it monthly.
And while you’re at it, consider upgrading your filter altogether. Newer, high-efficiency pleated filters have an electrostatic charge that attracts particles of dust and bacteria more aggressively, keeping them from spewing out into the air your HVAC provides. Sounds worth it to us.
2. Test Your Air Conditioner
Waiting for that first big heat wave to run your HVAC for the first time all year is probably not the best plan. Before temperatures rise, turn on your unit and let it run for a bit. Set the temperature a few degrees below the current indoor temperature, and check if air is flowing through the vents properly. Take note if there are any odd noises or clicking. If there seems to be something unusual going on, schedule a check-up with HVAC experts.
3. Check Your Duct Work
Professional duct cleaning can do wonders for your air quality and flow. That’s because your ductwork plays an important role in your system — they supply the air to each room of your home (in case you didn’t know). Removing the dust, mold, and other allergens that have built up over the winter will make a world of a difference for allergy sufferers come spring. While you can try to tackle this yourself, having an expert do it can ensure nothing is left behind. We recommend doing so every 5-7 years.
Also, check for any leaky joints, holes, or cracks that would cause your system to work overtime to maintain a comfortable temperature. Otherwise, you’re looking at higher utility bills and potentially larger issues down the road.
4. Install a Smart Thermostat
Chances are, you’re already using smart technology in several other areas of your home, so why not your cooling system? A programmable thermostat makes controlling comfort levels effortless — from anywhere! Forget to turn the AC down after leaving for a weekend trip? Adjust the temps from the car! Having trouble sleeping because it’s too hot? Find a cooler setting without ever leaving the bed. The benefits of a smart thermostat range from lower energy costs to a longer system lifespan, so why not?
5. Remove Debris from Your Outdoor Unit
Fall and winter are notorious for doing a number on your outdoor unit. Between leaves, branches, dirt, and the after-effects of ice and snow, there’s a lot that can cause your system to underperform. Start by inspecting the unit and remove any debris within two feet. Grab a garden hose or vacuum attachment to clean the coils. Lastly, cut back any bushes or plants that have overgrown into the space so that nothing is obstructing your system from getting the air it needs to cool your home.
6. Schedule Routine System Maintenance
Even after all these items are checked off your list, it’s always still a good idea to bring in a professional to perform a thorough inspection. These HVAC experts can ensure all connections are secure and there’s no significant wear on key components — such as compressors, tubing, fans, etc. — that can lead to bigger, more costly issues or a total system breakdown, and make any necessary repairs. They’ll also take electrical amp draw readings, check the pressure of the refrigerant, and test all sensors, all of which may be unfamiliar to you, but all in a day’s work for them. Schedule your appointment now before the busy season!